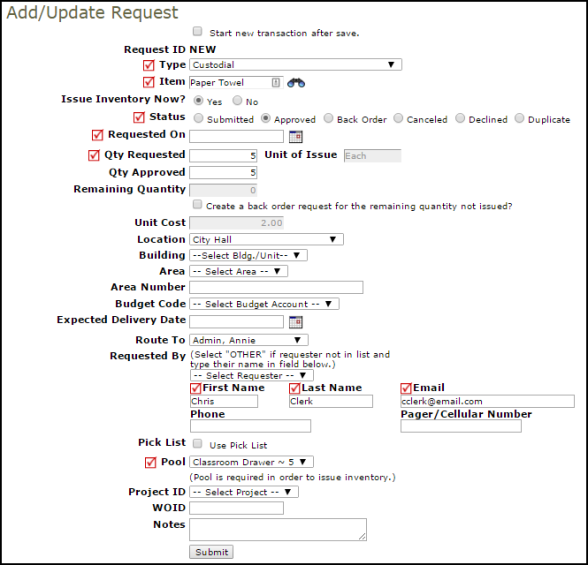
How to Enter an Inventory Request
As a pool manager, you may need to enter a request for another user or enter a request for approval. You can enter a request transaction and issue the inventory at the same time. Required fields are indicated by a red check box ( ).
).
- Click on the Requests link in the Information & Analysis section of the home page.
- From the Requests Shortcuts section, click on the New Request link.

- Select the Inventory Type of the item from the drop down list.
- Type the Item Number into the field or click on the binoculars icon to open a pop-up window where you can search for and select the item.
- Select if you would like to Issue the Inventory Now.
- Select the Status for the request. If you are issuing the inventory now, the system will automatically select Approved.
- Select the Requested On Date.
- Enter the Qty Requested. If you are issuing the item, enter the Quantity Approved. If you are not able to fulfill the entire request, you can create a back order request for the remaining quantity not issued by checking the box.
- Enter the Location, Building, Area, Area Number, and Budget Code information as necessary.
- Enter an Expected Delivery Date.
- If this request needs to be routed to another user for approval, select their name from the Route To drop down list.
- Enter the contact information for the user that requested these items by selecting their name under Requested By.
- If you are issuing the inventory now, you can submit it to a Pick List by checking the box. You will then be able to select an existing pick list or create a new one.
- Select the Pool that the item is being issued from. This is only required if you are issuing the inventory now.
- Enter a Project ID if needed.
- Enter the WOID if this request is tied to a work order.
- Enter Notes if needed.
- Click Submit to save the transaction.

